Wednesday, January 25, 2012

Grilled Chicken Cutlet Parmigiana


This recipe is an old favorite that I haven't made in awhile. Nick reminded me about it a few days ago, and I got an immediate craving for chicken smothered in a slightly-spicy tomato sauce layered with that deliciously gooey smoked mozzarella. This recipe is great any time of the year, but seems perfect for a chilly (er - mild?) winter evening when you don't have a ton of time to spend in the kitchen. There's no breading on the chicken, but you won't miss it as the cheese gets wonderfully brown and bubbly under the broiler (how's that for some alliteration!). Skip the pasta and serve it with some lightly sauteed spinach or a mixed-greens salad. Thanks to this recipe we can chow down on chicken parm and not feel guilty about it when we work out with our trainer tomorrow!

We just made half the recipe. Make sure you get the fire-roasted tomatoes as it adds a lot of flavor to this simple dish.


The Cuisinart Griddler works perfectly for grilling the chicken quickly. I just seasoned the cutlets with salt and pepper and used a cooking spray on the griddler to cut down on the fat.


Now, make the sauce. Start by cooking the onion, garlic and crushed red pepper flakes for about ten minutes. I know that some of you probably don't like the spice from the red pepper, but I think it adds a TON of flavor and pairs well with the fire-roasted tomatoes. It won't be that bad, I promise!


Then add the tomatoes, followed by the torn basil pieces. Remember the salt and pepper too (taste it to make sure you have the seasoning right).


Next, turn on the broiler and start assembling the dish (chicken first, then sauce, then smoked mozzarella pieces and grated Parmigiano-Reggiano). Slip it into the oven, and the cheese will brown up before you know it.


Oh, and once you are finished with dinner, you'll be seriously tempted to snack on that extra mozzarella  that didn't make it onto your plate. Not that anyone would actually give in to that temptation . . .


Grilled Chicken Cutlet Parmigiana
Serves 4 

Ingredients

  • 2 pounds thin cut chicken breast, cutlets
  • Salt and pepper
  • Extra-virgin olive oil, for drizzling, plus 2 tablespoons
  • 3 to 4 cloves garlic, chopped
  • 1 teaspoon crushed red pepper flakes
  • 1 small yellow skinned onion, finely chopped
  • 1 (28-ounce) can fire roasted diced tomatoes, such as Muir Glenn brand
  • 1 cup, 20 leaves, fresh basil leaves, shredded or torn
  • 1/2 cup Parmigiano-Reggiano
  • 1/2 pound smoked mozzarella, thinly sliced

Preparation

Heat outdoor grill or indoor grill pan to high. Season chicken with salt and pepper and drizzle with extra-virgin olive oil to keep it from sticking to the grill. Cook 3 to 4 minutes on each side and transfer to a foil covered platter to hold. If you are using a grill pan, cook the chicken in 2 batches if necessary. While chicken cooks, make sauce.

Place a medium pot on the stove over medium heat. Add 2 tablespoons extra-virgin olive oil, 2 turns of the pan. Add garlic, crushed red pepper flakes and chopped onions. Cook 10 minutes, stirring often. Add tomatoes and heat through, 2 minutes. Wilt in the basil and season the sauce with salt and pepper.

Preheat the broiler to high.

Layer the chicken with fire roasted sauce in a casserole dish. Top the casserole with Parmigiano and mozzarella. Brown the casserole under the broiler 3 minutes.

Tuesday, January 17, 2012

Mini Mocha Cheesecakes


I'm not a huge chocolate person, but this crazy week left me craving a huge piece of rich delicious chocolate cake with mounds of butter cream icing. I flipped through some cookbooks and settled on this recipe because of its simplicity and also because it has under 200 calories per serving! Awesome. You can also make these creamy individual cheesecakes up to three days in advance - great for entertaining. Nick, my foodie friend (and wonderful cook) Caitlin, and I loved the texture of the recipe. Think half cheesecake and half silky chocolate mousse. The chocolate flavor is intensified by the espresso powder and the vanilla. I ate mine with some whipped cream and extra cocoa powder while Nick paired his with some vanilla frozen yogurt.

You should be able to find Famous chocolate wafers in the cookie aisle at a standard grocery store (like Safeway or Giant). We definitely had to search through the shelves, though! If you can't find them, I think it would work to use an Oreo wafer.


This recipe is wonderfully simple - just throw all the ingredients into a food processor and puree! This was my first trial run using my beautiful new Cuisinart 9-cup processor (thanks Mom).


It only took me about a minute to puree the mixture until smooth.


Just fill each cup to the brim and then top with the chocolate wafer.


The only issue I have with these cheesecakes is getting them out of the muffin tin after refrigerating. I managed to free one after prying it out with a butter knife, but the second one got smashed using that method. Next time, I am going to overturn the tin on a cooling rack and then bang them out with a wooden spoon. Be careful when you remove the paper wrapper as the cakes are soft to the touch. Then, enjoy the guilt-free chocolate goodness (bonus - the cottage cheese has a lot of protein)!

Mini Mocha Cheesecakes
From Everyday Food Light (Martha Stewart)
Serves 9

Ingredients

  • 2 cups nonfat cottage cheese
  • 2 large eggs
  • 1 1/2 cups confectioners' sugar
  • 1/3 cup unsweetened cocoa powder
  • 1 tablespoon + 1 1/2 teaspoons all-purpose flour
  • 1 1/2 teaspoons instant espresso powder
  • 1 1/2 teaspoons pure vanilla extract
  • 9 chocolate wafer cookies, such as Famous
  • Whipped cream, for serving (optional)
Preparation

Preheat the oven to 275 degrees. Line 9 cups of a standard muffin tin with paper liners. In a food processor, combine cottage cheese, eggs, confectioners' sugar, cocoa powder, flour, espresso powder and vanilla. Puree until smooth, scraping down the sides as needed.

Divide mixture among prepared cups, filling each one just below rim, and place 1 cookie on top of each. Bake until fillings are set and cookies soften, 25 to 30 minutes. Transfer to a wire rack and let cool completely in pan, then refrigerate (in pan) at least 1 1/2 hours (or up to three days covered). 

To serve, invert cheesecakes onto plates and peel off liners. Top each with a dollop of whipped cream, if desired.

Per cheesecake (without whipped cream): 196 calories; 2 g fat (1 g saturated fat); 10 g protein; 34 g carbohydrates; 1 g fiber.


Saturday, January 7, 2012

Luciously Lo-Cal Lasagna


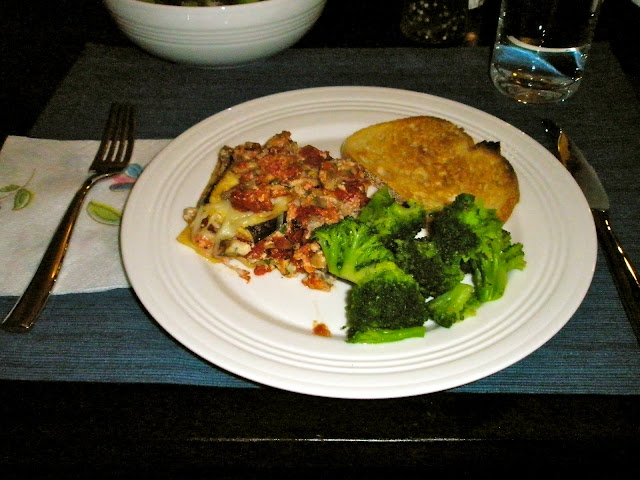
I practically ran home from work yesterday because I was so excited to make this little gem of a recipe for the second night in a row (well, that, and it was a frigid evening). This cheesy lasagna recipe from Hungry Girl is made with real noodles and will only cost you about 250 calories and 4 grams of fat! Definitely delicious and definitely New Year's resolution friendly. Nick, who has many Italian relatives, loved this lasagna and seemed satisfied even though this dish is so low in calories.

The recipe calls for eggplant and mushrooms - two meaty vegetables that add bulk to the dish without piling on extra calories. I really didn't miss the ground beef at all. The basil in the ricotta mixture adds some layers of flavor and a surprising freshness to a usually heavy meal.


The first time I made the recipe, I couldn't find crushed tomatoes, so I used diced. The recipe still worked well, but the consistency of the sauce is much better using the crushed tomatoes. If you like spice, I'd recommend adding some crushed red pepper to the tomato sauce mixture.


While this recipe took me about an hour to make start to finish, the baking time enables you to clean up most of the mess before sitting down to eat. It makes meal time more peaceful knowing you have a clean kitchen (or maybe we're just that OCD!).


I promise the next recipe will have some meat action in it. But, I must say, I've been enjoying all the veggie goodness. A nice way to detox after the holidays.

EZ Cheesy Lasagna
From Hungry Girl
Makes 2 servings

Ingredients

  • Two 1/4-inch thick eggplant slices (cut lengthwise from a long eggplant), patted dry
  • 2 tablespoons liquid egg whites
  • 1/2 cup fat-free ricotta cheese
  • 1 tablespoon chopped fresh basil
  • 1/2 teaspoon chopped garlic
  • 1/4 teaspoon salt
  • Dash ground nutmeg
  • 1 cup chopped mushrooms
  • 1 cup canned crushed tomatoes
  • 1/2 tablespoon Italian seasoning
  • Additional salt, black pepper, to taste
  • 2 sheets oven-ready lasagna noodles
  • 1/4 cup shredded part-skim mozzarella cheese
  • 1 tablespoon reduced-fat Parmesan-style grated topping
Preparation

Preheat over to 425 degrees. 

Spritz both sides of each eggplant slice with nonstick spray and place on a baking sheet. Bake in the oven for about 20 minutes, carefully flipping halfway through, until browned and softened.

Meanwhile, in a medium bowl, combine egg whites, ricotta cheese, basil, garlic, salt, and nutmeg. Stir well and set aside.

Bring a skillet sprayed with cooking spray to medium-high heat on the stove. Add mushrooms and, stirring occasionally, cook until softened, about 4 minutes. Stir mushrooms into ricotta mixture and set aside.

Add Italian seasoning to crushed tomatoes, and season to taste with salt and black pepper. Set aside. 

Spray a large loaf pan (about 9" x 5") with nonstick spray. Pour 1/4 cup tomatoes evenly into the bottom of the pan. Top with 1 lasagna sheet. Spread half of the ricotta-mushroom mixture on top, followed by another 1/4 cup tomatoes. Top with 1 eggplant slice.

Repeat layering with 1/4 cup tomatoes, 1 lasagna sheet, remaining ricotta-mushroom mixture, remaining 1/4 cup tomatoes, and remaining eggplant slice.

Evenly top with mozzarella and grated topping. Bake for 20 to 25 minutes, until cheese starts to brown.


Per serving: 238 calories, 4 g fat, 5 g fiber, 17.5 g protein.


Monday, January 2, 2012

Grandma Lois's Old World Apple Cake


My grandma is a fantastic cook and baker. She can throw together a pot roast with multiple sides AND dessert without breaking a sweat. Her skills can probably be attributed to growing up on her family's ranch in Hysham, MT - lots of hungry mouths to feed! I have several Grandma Lois recipes to share with you but thought I would do a post about one of my absolute favorites - Old World Apple Cake! As the comforting aroma of cinnamon filled the kitchen, Nick yelled out, "hey is that Old School Apple Cake almost done?" Sorry about that, Grandma.

While I had romantic notions that this was an original recipe that came over on the boat from Switzerland, Grandma told me the other day that she got the recipe from a friend at their old church in the Philadelphia suburbs. Regardless, the recipe has been a family favorite for years and is a big hit every time we serve it at holiday dinners, bridal showers, etc. In addition to being a great dessert (make sure you add a scoop of vanilla ice cream), a small slice pairs well with your morning coffee or tea.

The only time consuming part of this recipe is peeling the apples and slicing them super-thin. I just use a knife, but I'm sure a mandolin would work really well here to make uniform slices. Hmmm - maybe that will be my next kitchen gadget purchase!


The batter is very simple - just flour, sugar, oil, baking powder, salt, eggs, orange juice (I use no pulp) and a tablespoon of good-quality vanilla extract
 .


No need to pull out the KitchenAid stand mixer to tackle this batter. Just use your hand-held mixer - should take you less than a minute to get everything incorporated. I try not to over-mix the batter.


Grease and flour (I LOVE Pam's baking spray) a standard 12-cup bundt pan. Fill the pan with half the batter, then lay half the sliced apples on top and sprinkle with cinnamon and sugar. As you can see, I am not shy with the cinnamon.


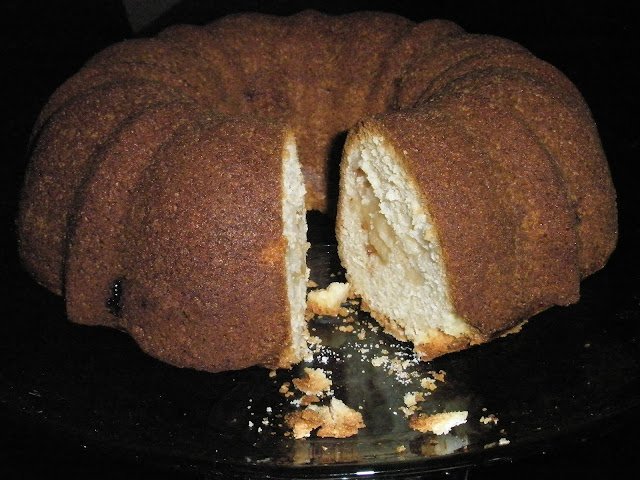
Pour in the rest of the batter, sprinkle with more cinnamon and sugar and bake. You end up with this beautiful, crusty-on-the-outside yet moist-on-the-inside apple cake. A sprinkling of powdered sugar would look nice, but I couldn't find any in the pantry (thanks Nick for finding it this weekend!).


Have some good friends over for tea and serve this cake. It'll help brighten up a cold and blustery winter day.


Old World Apple Cake
From Lois Oman

Ingredients
  • 2 cups thinly sliced apples (I used McIntosh)
  • 3 cups all-purpose flour
  • 2 cups sugar
  • 1 cup canola oil
  • 1/2 cup orange juice (I used no pulp OJ)
  • 4 eggs
  • 1 tablespoon baking powder
  • 1 teaspoon salt
  • 1 tablespoon vanilla extract
  • Extra cinnamon and sugar for sprinkling between cake layers
  • Powdered sugar for serving (optional)
Preparation

Preheat over to 350 degrees. Grease and flour a 12-cup bundt pan. Thinly slice the apples and set aside.

In a large bowl, mix together flour, sugar, oil, orange juice, eggs, baking powder, salt and vanilla extract. The batter should be smooth.

Pour approximately half of the batter into the bundt pan. Place the apple slices in an even layer on top of the batter. Sprinkle the apples with about 2 tablespoons of sugar and generously with cinnamon (just eye-ball it). Pour the additional batter into the pan and sprinkle cinnamon and sugar.

Bake for approximately 70 minutes. Cool for ten minutes and then remove the cake from the pan. Cool completely and, if desired, sprinkle with powdered sugar before serving.

Sunday, January 1, 2012

Blue Cheese-Apricot Bites

We made these yummy appetizers for New Year's Eve, but I think they would be a nice classy addition to your college football bowl watching menu. You can only eat so many nachos . . .

The recipe is very easy, and the final product has just the right mix of salty and sweet flavors. The cream cheese tones down the blue cheese, so it doesn't compete with the candied walnuts and the dried apricot. The walnuts also provide a nice crunch to these bite-sized little guys. Our local Whole Foods ran out of fresh rosemary, so I substituted sage (it was all we had in the fridge). The sage worked, but next time I will try to use rosemary. With only 30 calories per apricot, you can eat a few of these appetizers without blowing any food-related New Year's resolutions.

I was a little disappointed that we could only get brown (unsulfured) dried apricots, but they ended up looking nice with the white cheese mixture, light brown walnuts and sage. Less additives in the brown ones as well.


Heating up the walnuts, butter and sugar in the skillet. I was a little skeptical that 2 teaspoons of butter would be enough to coat the walnuts, but it seemed to work well.


Mixing up the blue cheese and low-fat cream cheese. It was spreadable and easy to dollop on the apricots.


Yum - these bites will be gone before you know it.


Blue Cheese-Apricot Bites
From The Ultimate Low-Calorie Book by Better Homes and Gardens

Ingredients

  • 2 t. butter
  • 2 T. finely chopped walnuts
  • 2 t. sugar
  • 1/2 t. finely snipped fresh rosemary or 1/4 t. dried rosemary, finely crushed
  • 1/4 c. crumbled blue cheese (1 ounce)
  • 2 T. cream cheese (I used low-fat)
  • 16 dried apricot halves
  • Snipped fresh rosemary for garnish (optional)
Preparation

Line a baking sheet with foil; set aside. In a small skillet heat butter over medium heat until melted. Add walnuts and sugar; cook and stir for 2 to 3 minutes or until walnuts are light brown. Stir in 1/2 t. rosemary. Cook and stir for 30 seconds more. Transfer nuts to the prepared baking sheet; cool.

Meanwhile, in a small bowl combine blue cheese and cream cheese. Beat with an electric mixer on medium speed until smooth.

Spoon cheese mixture onto apricot halves. Sprinkle with nut mixture. If desired, garnish with additional fresh rosemary. 

Nutrition facts per serving: 30 cal., 2 g total fat (1 g sat. fat), 3 mg chol., 31 mg sodium, 3 g carb., 0 g dietary fiber, 1 g protein.