Showing posts with label healthy dinners. Show all posts

Wednesday, July 11, 2012

Southwest Crispy Chicken Sliders


I am on a Cooking Light sandwich kick. This time we're making Southwest Crispy Chicken Sliders on a cheesy jalapeno cornbread muffin. While bacon, avocado, crispy chicken breast and cheese are on the ingredients list, two of these colorful sandwiches are just over 400 calories! We had them for lunch, but they would also make great appetizers or a fun addition to your next small plates dinner.

The recipe suggests you make your own cornbread muffins, and I was surprised at how quickly I mixed up the batter and got them into the oven. Not gonna lie - these muffins are on the "mini" side, but they stand up to the challenge of holding together some guac, chicken, and a thick tomato slice.

While the cornbread muffins are baking, I made some guacamole with chopped bacon and also prepared the crispy chicken pieces. Simply bread the chicken cutlets in panko breadcrumbs and then pan fry in a skillet over medium-high heat.

Building this towering slider is fun and easy - cut the muffins in half, layer on some guacamole, chicken, and a tomato slice and then finish with the muffin top! We enjoyed the subtle spice from the jalapeños in the cornbread and the crispy, salty bacon in the guacamole. The chicken stayed moist on the inside thanks to the crunchy panko bread coating. Nick and I both thought the chicken needed more seasoning, so next time, I am going to sprinkle some salt and pepper on the chicken breasts before breading them.


For a time-saving tip, you could also make the cornbread muffins in advance. They will stay fresh 2-3 days in an airtight container. If you have leftover muffins, serve them with some barbecued chicken and baked beans.


Southwest Crispy Chicken Sliders
Adapted from Cooking Light
Serves 6 (serving size - 2 sliders)

Ingredients:

Muffins -
  • 3 ounces all-purpose flour (about 2/3 cup)
  • 2/3 cup yellow cornmeal
  • 3/4 teaspoon baking soda
  • 1/4 teaspoon baking powder
  • 1/4 teaspoon kosher salt
  • 3/4 cup reduced-fat buttermilk
  • 2 tablespoons butter, melted
  • 1 large egg, lightly beaten
  • 1 1/2 ounces sharp cheddar cheese, shredded (about 1/3 cup)
  • 1 jalapeño pepper, seeded and minced
  • Cooking spray
Chicken -
  • 2/3 cup panko (Japanese breadcrumbs)
  • 1/4 cup fat-free milk
  • 1 large egg, lightly beaten
  • 6  skinless, boneless chicken cutlets, cut in half 
  • 2 tablespoons canola oil, divided
  • Salt and pepper to taste 
Additional ingredients -
  • 1 ripe, pitted, peeled avocado
  • 2 teaspoons fresh lime juice
  • 2 slices applewood-smoked bacon, cooked and crumbled
  • 12 (1/2-inch-thick) slices small, ripe tomato
  • 1/4 teaspoon kosher salt
  • 1/4 teaspoon freshly ground black pepper
Preparation:

Preheat oven to 350 degrees.

To prepare muffins, weigh or lightly spoon flour into dry measuring cups; level with a knife. Combine flour, cornmeal, baking soda, baking powder, and 1/4 teaspoon salt in a medium bowl, stirring well with a whisk. Combine buttermilk, butter, and 1 egg, stirring well. Add buttermilk mixture to flour mixture, stirring just until combined. Stir in cheese and jalapeño. Spoon batter into 12 muffin cups coated with cooking spray. Bake at 350 degrees for 17 minutes or until a wooden pick comes out clean. Cool 5 minutes in pan on a wire rack. Remove muffins from pan; cool on a wire rack. Cut muffins in half crosswise.

To prepare chicken, place panko in a shallow dish. Combine fat-free milk and 1 egg in a shallow dish, stirring well. Cut each cutlet piece in half, crosswise, to form 12 pieces. Heat a large skillet over medium-high heat. Add 1 tablespoon oil to pan; swirl to coat. Dip chicken in egg mixture; dredge in panko. Coat panko lightly with cooking spray. Add 6 chicken cutlets to pan; cook 3 minutes on each side or until golden and done. Repeat procedure with remaining 1 tablespoon oil, remaining 6 chicken cutlets, and cooking spray.

To prepare additional ingredients, combine avocado and lime juice; mash to desired consistency. Stir in bacon. Place 2 muffin bottom halves on each of 6 plates. Divide avocado mixture evenly among muffins; top each slider with 1 chicken cutlet and 1 tomato slice. Sprinkle tomato evenly with 1/4 teaspoon salt and black pepper; top with muffin tops.

Tuesday, May 22, 2012

Fish Tacos

We have several decent places to get fish tacos within walking distance of us (i.e. Baja Fresh and Lime Fresh Mexican Grill), but I decided to make them at home this weekend. The benefits? Controlling the amount of fat and using the freshest fish possible. The downside? Lots of steps and ingredients. Make these tacos on the weekend or your day off, folks!


Since I was going to the trouble of making homemade tacos, I decided to make these extra special with some grilled sweet corn (the first of the season), fresh cilantro and shredded napa cabbage on the side as fixings. Homemade tortillas would have been awesome, but I will save that challenge for some other time. I chose multi-grain tortillas as I'm not a huge fan of the corn ones.

The finished product was light and refreshing - full of fresh, crisp flavors like lime and cilantro balanced by the sour cream mixed with spicy and smokey chipotle peppers in adobo sauce. We used tilapia fillets - a light and flaky fish that will not overpower the other flavors in the taco. You could also use other white fleshed fish such as Mahi Mahi or Grouper (my favorite!). While this would be a great meal for grilling out, it is also grill-pan friendly for all you apartment dwellers.

First step is to get working on the grilled corn. My parents usually grill the ears in the husk, and then shuck the corn after grilling. I used another method that is a little easier for small stove-top grill pans - first soak the shucked ears of corn in a pot of cold water for about twenty minutes.


Chop up some onion and garlic. Place the ears on squares of aluminum foil, brush with olive oil, and then top with the onion and garlic (and some salt and pepper if you feel like it). Wrap the foil around the corn and twist the ends to secure the foil.


Place on a heated grill-pan and cook on medium-high heat for about twenty minutes, turning occasionally.


Set the corn aside and cool.

Whisk together the olive oil, lime juice (add a little zest if you want your fish to have extra lime flavor), and salt and paper in a small bowl. Pour the marinade over the tilapia fillets and let the fillets rest at room temperature while you prepare the other ingredients.


My chipotle cream sauce is just two teaspoons of chopped chipotle peppers in adobo sauce mixed with 1/2 cup sour cream. You could also use Greek yogurt for the base if you have that on had (just add some reduced-fat mayo for tang).


Grill the fish using your Griddler or a grill pan. It will just take a few minutes per side. Set aside for a few minutes, so the fish can cool. Then, shred the fish with a fork.


Using a sharp knife, take the corn kernels off the cob by standing the cob upright and sliding your knife across it in a horizontal motion.


Chop up a little cabbage or lettuce for extra crunch. Make sure you have some cilantro leaves and lime wedges on the side as well!


If you feel like being extra fancy, warm up the tortillas in the microwave or over on the grill for a few seconds. Build your taco by slathering some chipotle cream on your tortilla, followed by cabbage, fish, corn and cilantro. Serve it up with a lime wedge for an added citrusy tang. Most of us could use more fish in our diet, so try this recipe the next time you have a craving for Mexican food! 


Fish Tacos
Serves 3-4
Adapted from Ellie Krieger's The Food You Crave

Ingredients:
  • 2 tablespoons + 2 teaspoons olive oil, divided
  • 2 tablespoons freshly squeezed lime juice
  • salt and pepper to taste
  • 3/4 pound white flaky fish fillet (I used tilapia)
  • 2 small ears sweet corn (or 1/2 cup frozen corn, thawed)
  • 1/2 white onion (if grilling corn)
  • 2 cloves garlic, chopped (if grilling corn)
  • 2 teaspoons olive oil
  • 1/2 cup sour cream
  • 2 teaspoons chipotle pepper in adobo sauce
  • 1/4 cup fresh cilantro leaves
  • 1/2 cup shredded cabbage
  • Lime wedges for serving
In a small bowl, whisk together the oil, lime juice, salt and pepper. Pour over the fish fillets and let marinate for 20 minutes.

Remove the fish from the marinade and grill on a preheated grill or nonstick grill pan over a medium-high heat until cooked thorough, about 3 minutes per side. Set the fish aside on a plate for 5 minutes.

If grilling corn, remove the husk and then soak the ears in cold water for about twenty minutes. Meanwhile, chop onion and garlic. Place one ear on a sheet of aluminum foil and brush with olive oil. Top with half of the garlic and onion and then wrap in the foil, being sure to seal the edges. Repeat with the other ear of corn. Grill for about twenty minutes over medium-high heat, turning occasionally. (NOTE: You can skip this step entirely if you are just using frozen corn kernels).

In a small bowl combine the sour cream and chipotle pepper.

Heat the tortillas on the grill or grill pan for 30 seconds on each side.

Flake the fish with a fork. Top each tortilla with 1 tablespoon of the chipotle cream. Top with fish, cabbage, corn and cilantro and serve with lime wedges.

Wednesday, March 28, 2012

Green Lentils with Wine-Glazed Vegetables


I am very excited to start a new project - cooking through the recipes friends and family gave me for my bridal shower. My mom put them in a cute recipe binder, and I managed to read through them several times but haven't made anything yet!

The first recipe is from Katrina, a dear friend from middle school. Even though I moved to Michigan at the beginning of high school, we have stayed in touch and even vacationed together one summer. We both got married last year and attended each other's weddings too (hers in California and mine in the D.C. area!). Katrina is probably one of the smartest, if not the smartest, person I know. She and her husband Michael are moving back to the east coast, so she can begin medical school - and she already has a PhD in psychology!

Katrina is a vegetarian, so she gave me this great recipe for green lentils. I don't think I've cooked lentils before, so this recipe provided a great reason to try it out! The red wine and Dijon mustard in the glaze totally make this recipe. The red wine flavor intensifies over time, so this meal makes fantastic left-overs. I even ate the lentils cold for lunch. I recommend making the recipe on a weekend night when you have some extra time to stand over the stove as the sauce takes awhile to reduce. If you want to add some extra protein, I think the lentils would be a great base for grilled chicken or salmon.


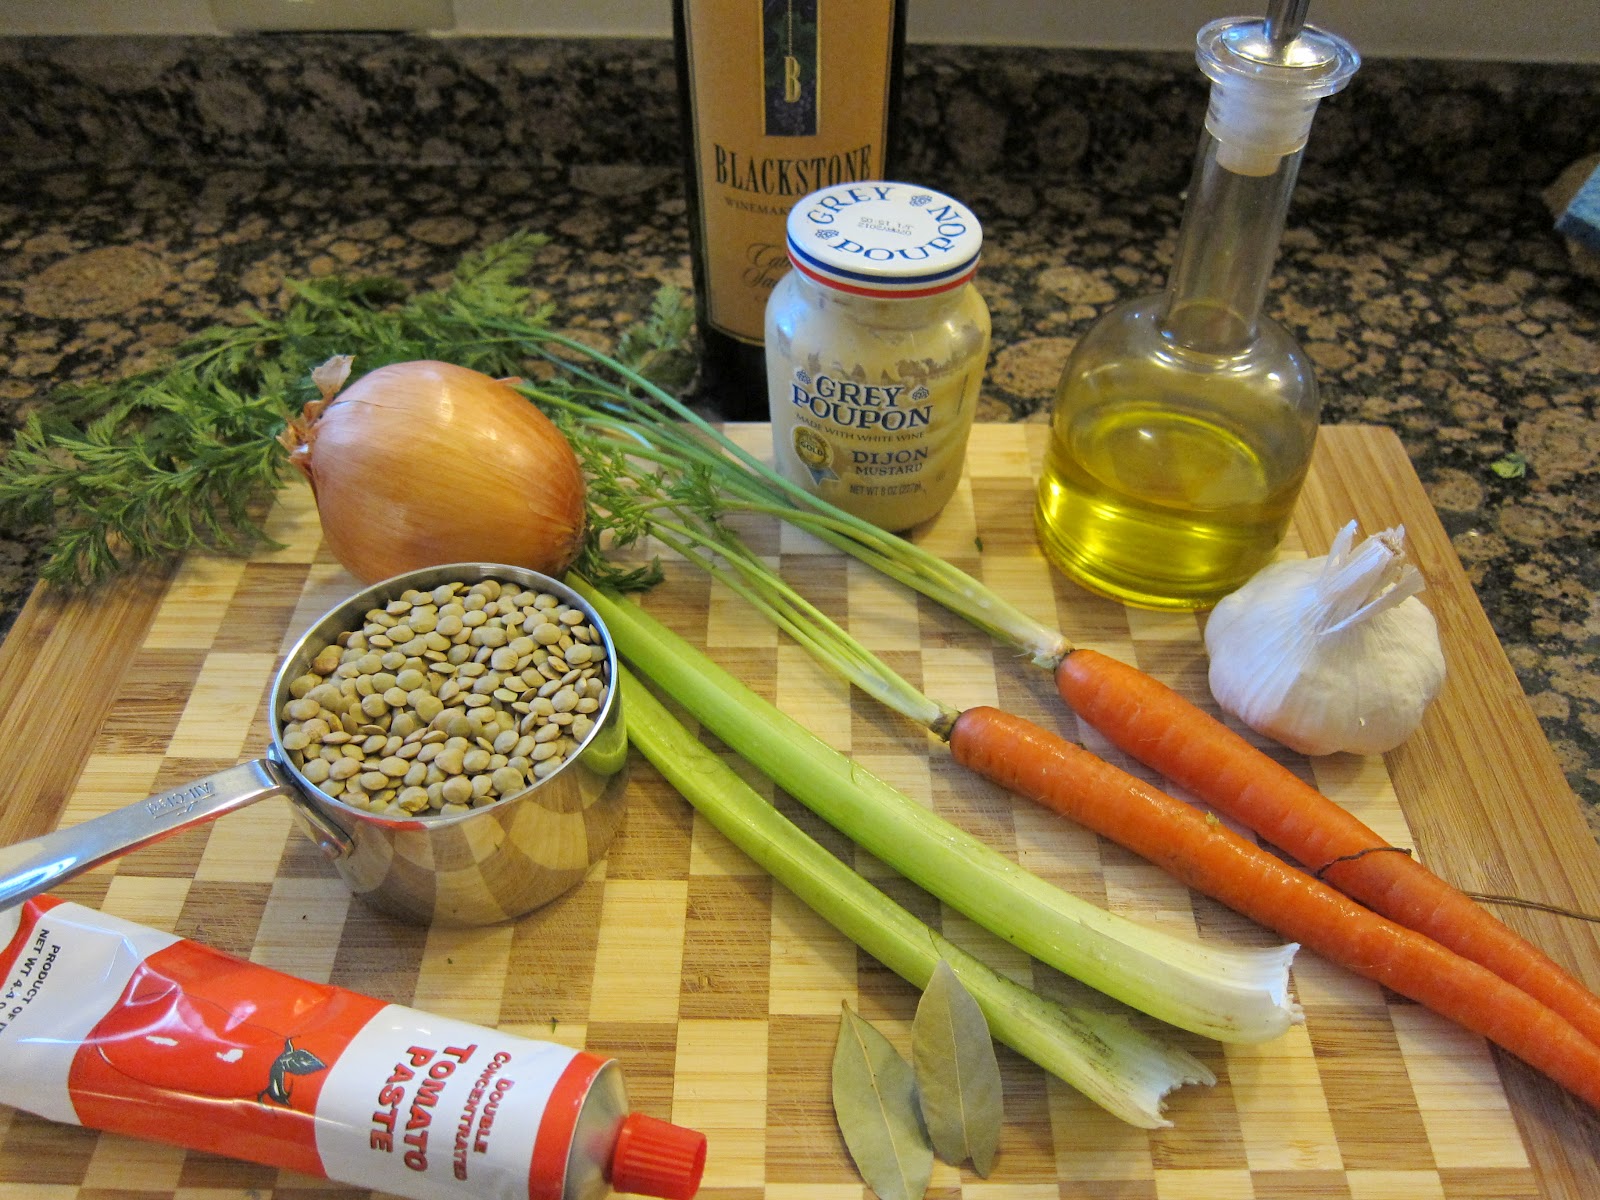
Chop up your veggies and the garlic.


Then, bring the lentils and water (it's a 2 to 1 ratio of water to lentils) to a boil. Add in a bay leaf for added flavor. Reduce the heat and simmer for about 25 minutes.


When the lentils have about 10-15 minutes to go, start sauteing the celery, carrot and onion in a large pan (I used a healthy drizzle of olive oil here). Saute until the veggies start to brown.


Then, add in the tomato paste and garlic (I just love this tomato paste in a tube - so much easier to store the leftovers!).


Add in the wine followed by the Dijon mustard.


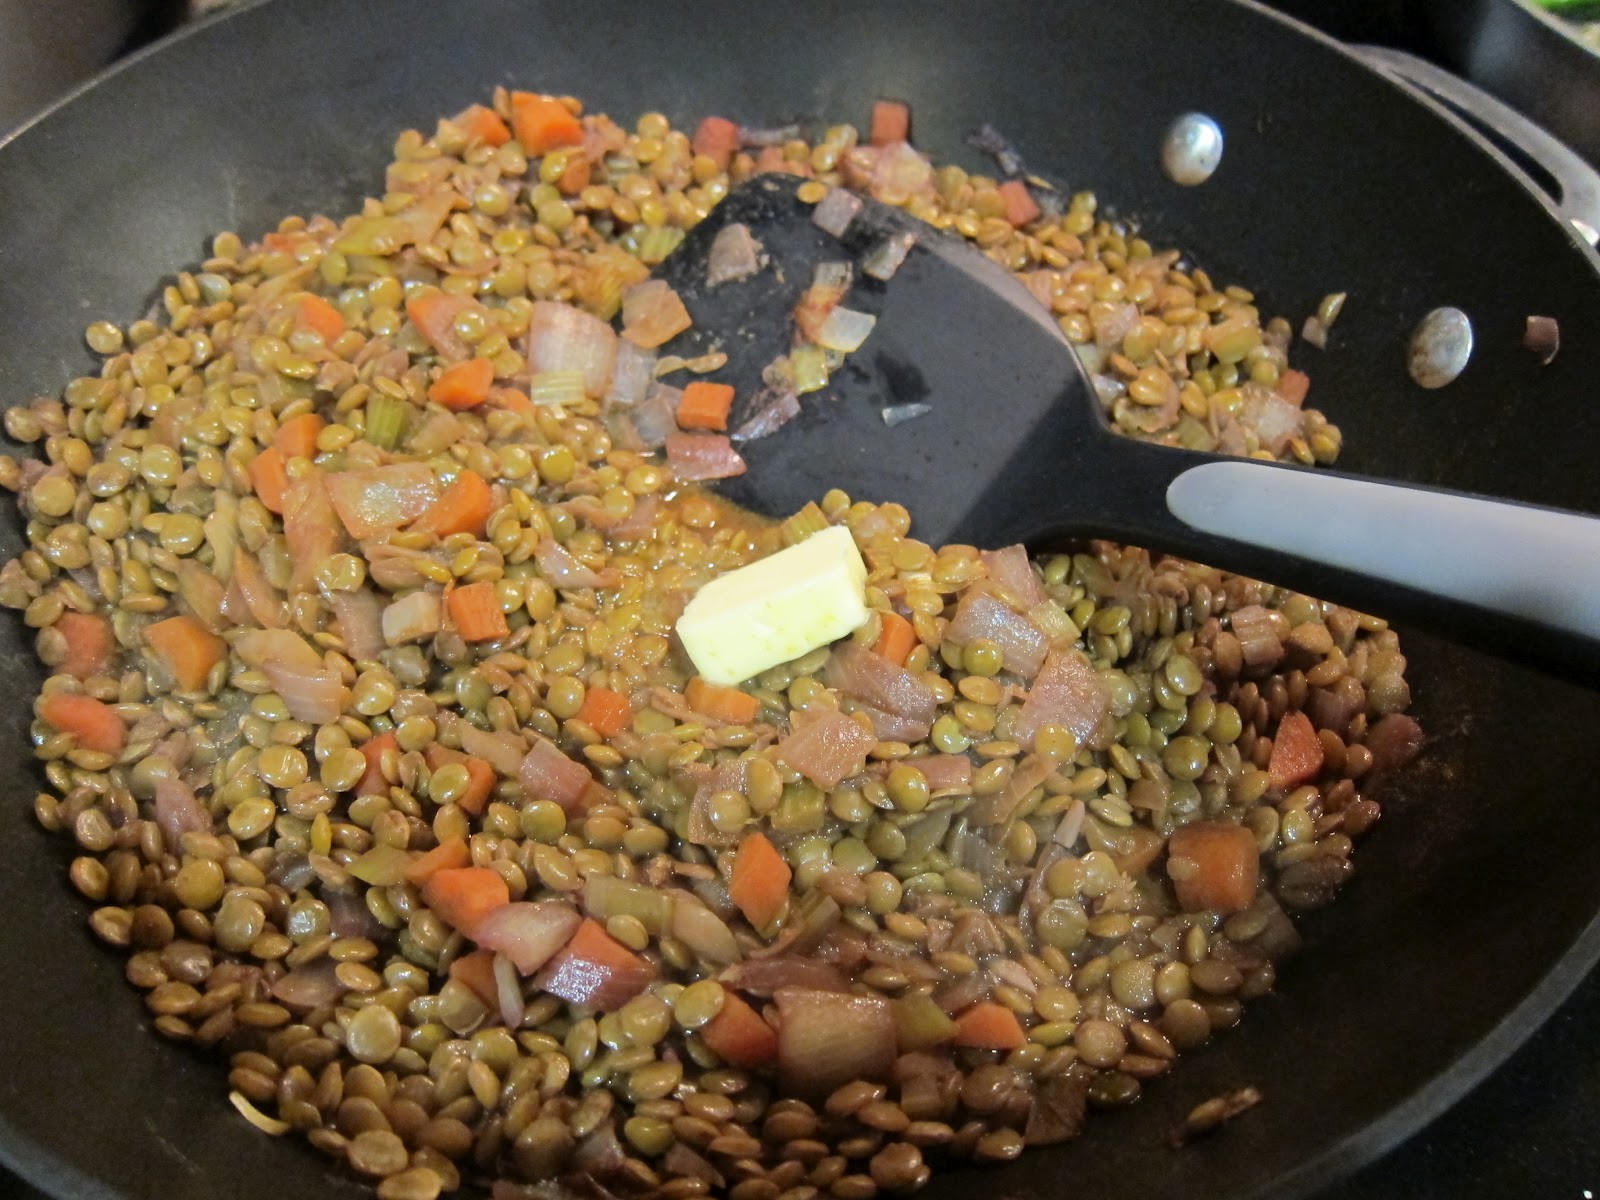
Add the lentils back in and then simmer until the liquid is reduced. I added in about a tablespoon of butter to add some richness to the sauce.


Katrina offers up two "fancy" variations on the recipe. You can serve the lentils in individual ramekins topped with puff pastry dough (just throw them in the oven to bake the puff pastry). I chose to serve the lentils over some wilted rainbow chard for some added green vegetable goodness!


Green Lentils with Wine-Glazed Vegetables
From Katrina's Kitchen
Serves 4-6

Ingredients
  • 1 1/2 cups green lentils
  • 2 teaspoons olive oil
  • 1 carrot, diced
  • 1 medium onion, diced
  • 1 or 2 celery stalks, diced
  • 1 or 2 garlic cloves, minced
  • 1 tablespoon tomato paste
  • 2/3 cup dry red wine
  • 2 teaspoons Dijon mustard
  • 1-2 tablespoons tablespoons butter or olive oil
  • Parsley (optional)
Bring lentils, 3 cups water, 1 teaspoon salt and bay leaf to a boil, then return to simmer and cook for about 25 minutes.

Heat oil in pan. Add onion, carrot and celery and season with salt. Cook over medium heat until browned. Add garlic, tomato paste and cook a minute more.

Add wine (Katrina mentions that you should pour some in a glass for the cook as well). Bring to a boil, then lower heat and simmer until the liquid is syrupy. Stir in the mustard and add the cooked lentils with the broth. Top with fresh parsley if desired.

Fancy Variations:

1) Put finished dish in ramekins and top with puff pastry. Bake at 375 degrees for 25 minutes.
2) Serve over a bed of wilted chard.

Simmer until sauce is reduced, then stir in the butter or olive oil and season with pepper.

Friday, March 23, 2012

Shrimp, Mango, and Avocado Salad


It's only March, and I'm already looking for no-bake recipes, so I don't have to use the oven or the stove top. What is going on with this weather? Whatever it is, I'll take it.


Nick gets credit for finding this recipe. It is one of his "go-to" meals for a quick yet delicious weeknight dinner. There's really nothing special about the contents of the salad - shrimp, mangoes and avocado over a bed of lettuce. What makes it fantastic is the sweet and spicy vinaigrette dressing. The base is Vietnamese sweet chili sauce, and then you add in unseasoned rice vinegar, fresh or ground ginger, and salt and pepper to taste. You can find the chili sauce and the vinegar in the ethnic foods aisle of most grocery stores. While the vinaigrette tastes sweet initially, the heat can sneak up on you. A bit of sweet mango and creamy avocado will help cool you down, though!

I didn't have fresh ginger on hand, so I used about one teaspoon of ground ginger. Fresh is always better, but the ground will do in a pinch.


Once you make the vinaigrette, just pour a few tablespoons over the thawed shrimp and toss to coat.


Chop up your mango. I used the Champagne mangoes at Whole Foods. They are small, wonderfully sweet and usually don't need much time to ripen.


Trying to get the hang of my avocado slicer. It sort of worked.

Now, all you need to do is toss the shrimp, mango, avocado and lettuce into a bowl and pour on the rest of the vinaigrette.


 Take a bite, and you'll be transported to that little cafe at your favorite tropical spring break getaway.


Shrimp, Mango, and Avocado Salad
From The Bon Appetit Test Kitchen
Serves 2 (main course servings) or 4 (first-course servings)

Ingredients
  • 1/2 cup Vietnamese sweet chili sauce
  • 2 tablespoons unseasoned rice vinegar
  • 1 tablespoon minced and peeled fresh ginger or 1 teaspoon ground ginger
  • 12 peeled cooked large shrimp (about eight ounces) - I used frozen shrimp
  • 1 large head of butter lettuce or 1 package of "salad in a bag" of your preference
  • 1 mango, peeled and pitted, cut into 1/3-inch thick slices
  • 1 avocado, halved, pitted, peeled, cut into slices
Preparation

Whisk sweet chili sauce, rice vinegar and ginger in a small bowl; season with salt and pepper. Place shrimp in a medium bowl. Add 3 tablespoons of the vinaigrette; toss to coat.

You can either put all the salad ingredients in a large bowl and mix in the vinaigrette or place the ingredients on each plate and then serve the vinaigrette on the side.

Tuesday, March 20, 2012

Slow-Baked Salmon with Lemon and Thyme


I really enjoy eating fish, but lately, I've been totally unmotivated to cook it at home. We generally buy frozen fillets (tuna or swordfish), season with salt and pepper and then grill it on the Griddler. I am usually underwhelmed by the finished product, and our apartment smells like fish for days!

This blog, however, is all about tackling culinary challenges, so I spent my weekend scouring Epicurious for an easy and appetizing fish recipe. Nick and I decided on salmon, and I was intrigued by a simple recipe for baked salmon with lemon and thyme. I started getting really excited about it when we found gorgeous 6 oz. fillets at Whole Foods.


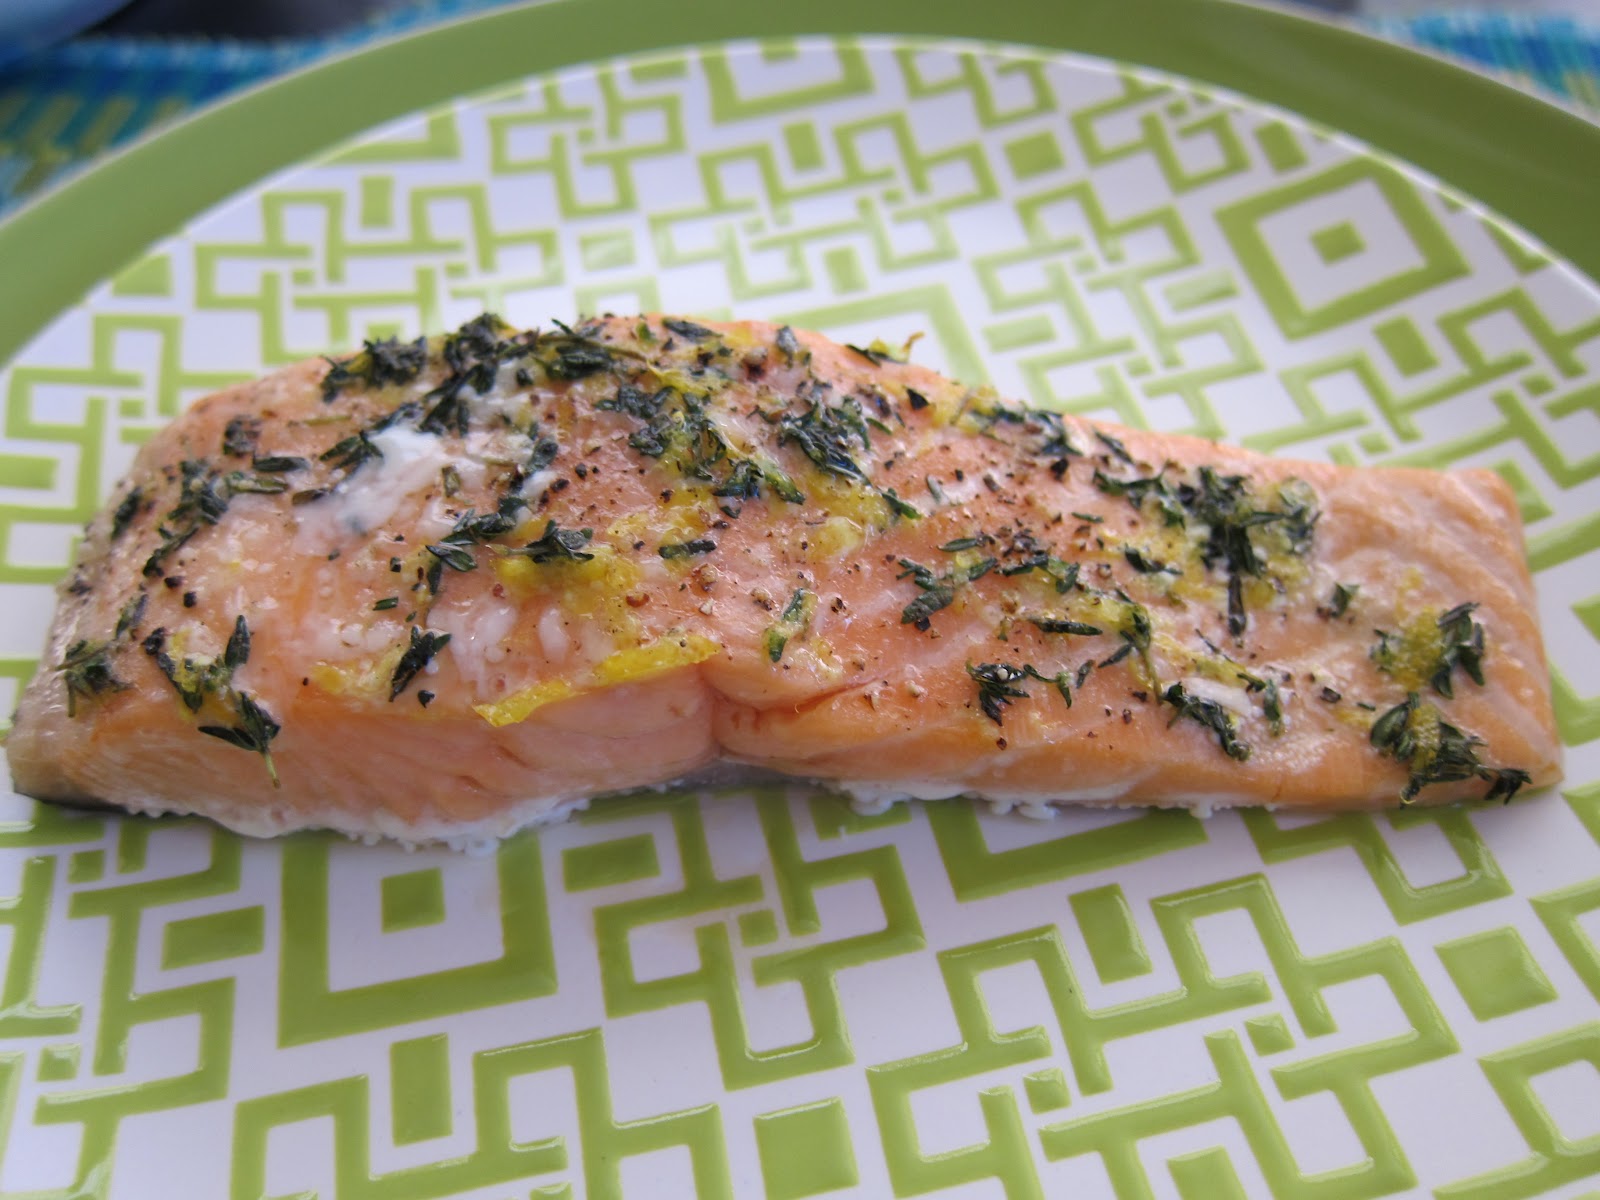
This recipe is simple and good for you with fresh ingredients that will make you want to cook! You can make this dish in under 30 minutes, and the result is a melt-in-your-mouth salmon fillet bursting with citrus and herb flavors. Making the salmon in the oven also helps keep the fish smell at bay.

Line a rimmed baking sheet with aluminum foil and coat with cooking spray. Place the salmon fillets, skin side down, on the baking sheet.


Zest a lemon, chop up some fresh thyme leaves and mix together with a tablespoon of olive oil. Brush the oil mixture on the salmon fillets and then season each fillet with salt and pepper. Let the fillets rest for 10 minutes before baking to help the flavors meld.


Bake for 15-18 minutes, and that's it! The fillets will slide right off the aluminum foil on to your plate, making clean-up a breeze. This recipe is also versatile - what about using fresh rosemary instead of thyme? Lime zest with a little roasted garlic and olive oil would also be yummy. Let me know if you think of any other ideas!


Slow-Baked Salmon with Lemon and Thyme
Adapted from Epicurious
Serves 2

Ingredients
  • Cooking Spray
  • 1 tablespoon olive oil
  • 2 6-oz boneless salmon fillets, skin on
  • 1 tablespoon fresh chopped thyme
  • Zest of one lemon, plus lemon wedges for serving
  • Salt and pepper to taste
Preparation

Preheat oven to 275 degrees. Line a rimmed baking sheet with aluminum foil. Spray the aluminum foil with cooking spray, and place the fillets on the foil, skin-side down.

Mix the oil, thyme and zest in a small bowl. Brush the mixture on the fillets, and then season with salt and pepper. Let stand for 10 minutes.

Bake the salmon for 15-18 minutes until just opaque in the center. Serve with lemon wedges.

Wednesday, March 7, 2012

Jamie Oliver's Tomato Soup


I am a big Jamie Oliver fan. His cookbook, Jamie's Food Revolution, has simple, fresh recipes that encourage busy "reluctant home cooks" to get back in the kitchen. Nick and I enjoyed watching his TV show of the same name where he worked to solve our nation's obesity problem by developing healthful eating programs in cities across America. Check out his TED speech to learn more. We decided to make this delicious tomato soup along with the Macaroni and Four Cheeses from last week. It is bursting with fresh tomato and basil flavor and comes together quickly - you'll never go back to canned tomato soup again! Jamie's recipe suggests that you just add the salt at the end, but I think it would help to use it when sauteing the carrots, celery, onions and garlic to get more flavor. 

Roughly chop up the onions, celery, carrots and garlic. Heat a large pot over medium heat and add about a tablespoon of olive oil. Meanwhile, start heating the chicken or vegetable broth in a sauce pan.


Add the vegetables and some salt. Saute for approximately ten minutes with the lid askew (stir occasionally). The carrots and celery will be soft and the onion starting to turn color when the vegetables are done. 

Just look at that beautiful aubergine Staub pot. Sigh.

Add in the canned and fresh tomatoes.


Pour in the heated broth and bring the mixture to a boil. Turn down the heat and simmer for ten minutes.


Add in the fresh basil, salt, pepper and maybe some red pepper flakes if you like spice. 


And now here's the fun part - pull out your trusty immersion blender (this kitchen gadget is so worth it - go get one now) and blend, baby, blend. You'll have a nice smooth puree when you are done.


Top that tomahto soup with some cheese, slurp it up, and you'll be ready to start your own food revolution.


Tomato Soup
Adapted from Jamie's Food Revolution by Jamie Oliver
Serves 6-8

Ingredients
  • 2 carrots
  • 2 celery stalks
  • 2 medium onions
  • 2 cloves of garlic
  • 1 3/4 quarts chicken or vegetable broth
  • olive oil
  • 28 ounce can plum tomatoes
  • 6 large ripe tomatoes
  • Small bunch of fresh basil
  • Sea salt and freshly ground black pepper
  • Crushed red pepper (optional)
Preparation

Peel and roughly slice the carrots, slice the celery, peel and roughly chop the onions and peel and slice the garlic. Put the broth in a large saucepan and heat until boiling.

Put a large saucepan on medium heat and add 1-2 tablespoons of olive oil. Add the chopped ingredients and mix together. Add about 1/4 teaspoon salt. Cook for around 10 minutes with the lid askew until the carrots have softened but are all still holding their shape, and the onion starts to turn color.

Add the boiling broth to the pan with your canned and fresh tomatoes, including the green stalks that may still be attached (provides additional flavor). You should save the sauce from the canned tomatoes and add in case the soup is too thick. Stir and bring to a boil. Reduce the heat and simmer for 10 minutes with the lid on.

Remove the pan from the heat, and season with salt and pepper (you can also add in some crushed red pepper flakes if you'd like) and add the basil leaves. Using an immersion blender, pulse the soup until smooth. Season again before dividing between serving bowls.